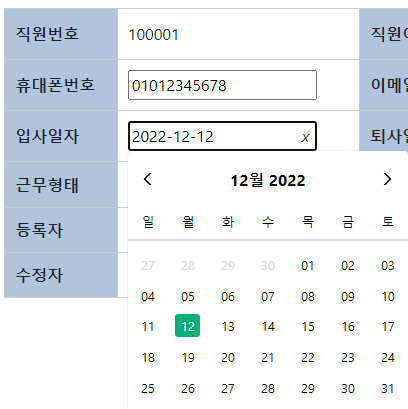
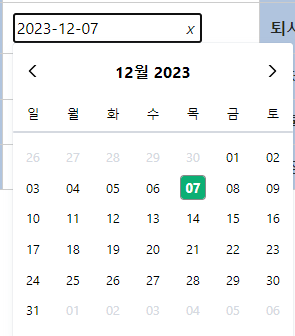
먼저 datepicker를 다운받아야 하는데요
npm install vue3-datepicker를 해서 패키지를 받아줍니다.
다음은 본론인 코드로 넘어가겠습니다.
<tr v-for="user in userDetail" :key="user.DEPLOY_NO">
    <th>입사일자</th>
    <td><Datepicker
        v-model="picked"
        :locale="locale"
        :weekStartsOn="0"
        :inputFormat="inputFormat"
        :clearable="true"/>
    </td>
    ...
이렇게 <td>를 만들어 줍니다. - 상황에 따라 변형은 자유롭게 하면 됩니다.
<script>
import {ref} from 'vue';
import Datepicker from 'vue3-datepicker';
import axios from 'axios';

let picked = ref(new Date()); // 오늘날짜
const locale = reactive(ko);
const inputFormat = ref('yyyy-MM-dd');

export default {
...
변수 선언을 해줍니다.
조회할 때 데이터 바인딩 하는 방법입니다.
selectRow(rowId) {
    // 직원정보 테이블 데이터 조회
    axios.post(`/grid/selEcoGridDetail`, {rowId})
    .then((response) => {
      this.userDetail = response.data;

      if (response.data.length > 0 && response.data[0].ENTR_DT) {
      	// 조회된 날짜로 셋팅
        picked = new Date(response.data[0].ENTR_DT);
      } else {
      	// 오늘 날짜로 셋팅
        picked = ref(new Date());
      }
    })
    . catch ((error) => {
      console.error('Error 직원정보 테이블 데이터', error);
    })
},
axios문은 자유롭게 사용하시면 되고,
아래 if문으로 조회된 데이터로 일정 셋팅되게 만들어줍니다.
신규버튼을 눌렀을 때 오늘날짜로 셋팅하는 방법입니다.
addNewEmployee() {
    // 신규 버튼 클릭 시 오른쪽 테이블 초기화
    picked = ref(new Date());

    this.userDetail = [{
        ...
        ENTR_DT: picked,
        ...
    }];
},
이렇게 하면 조회 눌렀을 때 조회된 날짜로 캘린더 날짜가 나오고,
신규 눌렀을 때 오늘 날짜로 조회가 되는 Datepicker가 완성됩니다.
공식문서 : https://icehaunter.github.io/vue3-datepicker/examples.html
'Web Programming > JavaScript' 카테고리의 다른 글
| [Html5, JavaScript] image resizing (이미지 리사이징) (0) | 2024.02.07 |
|---|---|
| [React + SpringSecurity + DB] 로그인 구현하기 (frontend) (0) | 2024.01.18 |
| [Kendo Vue + SpringBoot + Oracle] 동적인 메뉴 아코디언 만들기(Creating a dynamic menu accordion) (3) | 2024.01.03 |
| [Vue.js] select 태그에 데이터 바인딩하기 (0) | 2023.12.05 |
| [Vue.js] input 태그에 데이터 바인딩하기(feat. v-model, type, :value) (1) | 2023.12.05 |


